It’s no secret I love to DIY & painting furniture is one of my favorite ways to express my creativity. What I particularly love about painting furniture is that you can completely transform a piece in your house without having to buy something new, even if you’re a total beginner!
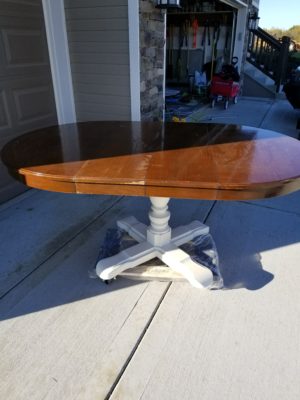
I recently updated my kitchen table & chairs. Instead of buying brand new & spending lots of money, I bought an old pedestal table & cane back chairs from my local thrift store. You can read all about MY KITCHEN TABLE MAKEOVER. This particular post is getting into the details of HOW I did it. You can use this post not only for your own table, but other projects as well! I’m not an expert by any means but I’ve done dozens of projects for my house & other people. You can check out some of those projects like my HIDDEN LITTER BOX on my BLOG. or HERE. I’ve learned by doing a LOT of research & trial & error & am hoping to pass any of my knowledge & experience on to help others! Don’t let furniture projects intimidate you!
*Note: This post contains affiliate links. These are links to items that I’ve used or suggest so that you may find them easier. It doesn’t cost you anything extra if you buy anything. I may make a very small percentage that I can use towards buying groceries & diapers & such so thank you for your support!
Here are the general steps I use for my furniture projects.
PREP
CLEAN: First, it’s always important to give all your furniture a good cleaning. Use Mineral Spirits with a rag to wipe down. This gets any grease & dirt & who knows what else off & makes it easier for paint to stick. Even when you think it’s not dirty, trust me it is! Allow this to completely dry & evaporate off your project then I like to wipe down with rag & water & let dry.

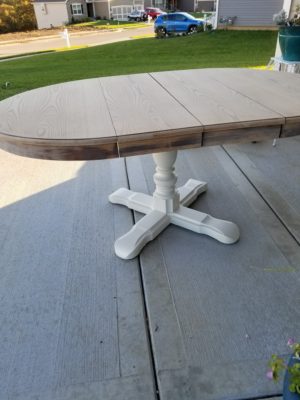
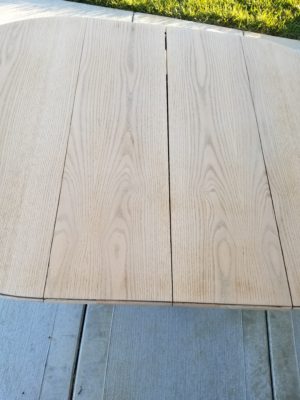
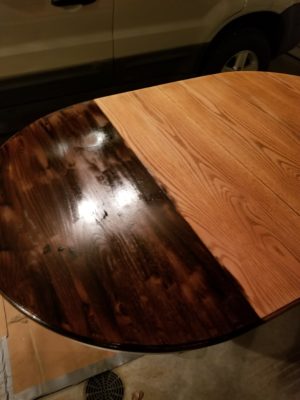
SAND: Sanding depends on your project. If you are working with wood & stain then you absolutely MUST sand down to the grain. *TIP: Be careful you don’t sand too much, just make sure it’s down to the grain & nice & smooth. For my kitchen table this was the most grueling part. Sanding a table top down is no joke. Don’t even attempt it unless you have an electric one like mine. Start with course sand paper & then finish with a fine to make sure it’s nice & smooth. I like to start with a 120 grit & if it’s not course enough to take off the finish then I will choose an 80 or 60. You always want to finish with a 220 grit to make it smooth. For a project you are painting, sanding depends on what type of paint you are going to use & the condition of the project. Chalk paint claims no prep work including no sanding. I like to give my piece a light sanding with a 220 however just for good measure. If you are painting with a latex paint, you will want to sand down your surface so that any of the shiny finish is removed. This also help remove blemishes. You do not have to sand down to the bare wood if you are painting. Use a medium to fine grit. Again always remember to finish with the fine grit paper, no matter what you started with. Usually just using a sheet of paper or a block by hand is sufficient for this type of project. For other surfaces such as laminate, plastic, particle board, metal, etc. you can’t really sand that down.
FIX ANY SCRATCHES OR HOLES: I use THIS. Apply it with a putty knife, let dry, then lightly sand with fine grit sand paper.
REMOVE DUST: Take a clean rag & wipe away all dust. I also like to use my shop vac. It has a cool option that it turns into a blower also so I like to blow off the dust then wipe it down. Tack cloth is great for this because it’s sticky. Running a rag over it will also catch any spots that still need to be smoothed down because it will catch on or snag your rag.
STAINING: If you are painting the entire piece, you can skip this step & go directly to painting. I chose to paint the base of my table before staining on this particular project.
WOOD CONDITIONER: Use a wood conditioner to condition the wood to ensure even staining results. Don’t skip this! Use a brush or rag to apply then wipe off with a rag. Follow the directions on your particular conditioner you use!

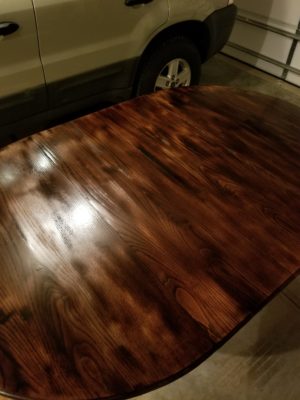
STAIN: There are a few types of stain: water based, oil based, oil based gel…. You can read about the Minwax stains & their details HERE. I have personally only used the oil based for my projects & I’ve used the gel stain once for a coffee table. The oil based has worked beautifully for me. Here are all of the colors. For my own kitchen table project I used a mix of jacobean, expresso & dark walnut. Don’t be afraid to mix for your own custom color! Use these brushes for your staining project. I always recommend using a good quality brush when staining or painting. It makes a big difference & if you go cheap you usually get what you pay for.
SEAL: I always seal the top of a stained surface or the top of a painted surface that will have wear & tear on it such as a table, nightstand, etc. using Polyacrylic. There are other things to seal with, so you can do your research but this is what I use. It allows you to wipe it down easily & protects the surface.
PAINT: There are a bunch of types of paint you can use. The 2 I’m most familiar with & use on a regular basis are latex & chalk paint.
LATEX PAINT :requires a little more prep work & you need to use a coat of primer first in most cases. PRIME: Kilz or Zinsser are my go-to primers. For really tough surfaces to paint such as plastic I’d chose a stronger adhesion primer such as Kilz Max . For my latest kitchen table makeover I used Sherwin Williams Antique White. It is the perfect off white color & it’s the same paint I used for my NIGHTSTAND MAKEOVER in my bedroom. I may have used chalk paint to match the antique white for that project I can’t quite remember, but the color is a perfect soft white. SEAL: Again, seal your piece with a sealer such as Polyacrylic if it gets lots of traffic. You can get away with not sealing latex paint on an indoor project, especially if it’s a semi or gloss paint, you can usually wipe those down.
CHALK PAINT: Consider this the “Dummies guide to painting” paint. Very little prep, easy clean up with just water. It’s hard to screw up. It’s a bit pricier than latex paint but worth it in my opinion. The only one I’ve used is Valspar Chalky Paint. You can get it at Lowe’s. They have their own wide variety of colors to chose from. Check out the gorgeous CHABBY CHIC INSPIRED KITCHEN TABLE FLIP project I did using Valspar’s Chalky Paint in Trousseau Blue. (Very similar to Annie Sloan’s Duck Egg Blue). I’ve never used the ever so popular Annie Sloan because I prefer a paint that’s more accessible to buy, plus it’s pricey. There are several others OR you can make your own using Plaster of Paris, though I’ve never done it. Check out this Pinterest post on how to make your own! DISTRESS:(optional) Use a fine grit 220 sand paper to distress your piece. This is for a piece that is worn looking which is quite popular. Lightly sand over areas that likely to wear such as edges & corners. If you want a fresh perfect looking piece, then don’t distress or antique. I did not distress my kitchen table. SEAL: You HAVE to seal when you use chalk paint. Seal with clear wax. For an antique look, use the antique wax. This stuff is quite intimidating at first but I can assure you it’s quite simple. Wipe on & wipe off! Just make sure you apply the clear wax coat first! I honestly love chalk paint, it’s so easy!
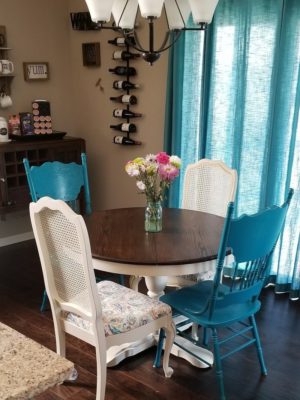
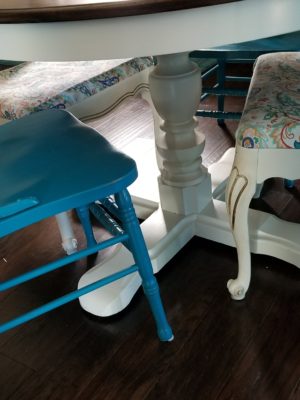
Here is the final product! For more pics see MY KITCHEN TABLE MAKEOVER post!
THAT’S IT! You’re probably thinking “Really?! That sounds like a lot of work!” Well…it is to a certain extent! But that doesn’t mean you CAN’T do it! Anyone can do it you just have to have a little patience & be willing to take the time. As I always say, “Work smarter, not harder”. This means, as tempting as it can be, don’t skip steps! Do your prep work & I promise you it will be worth it in the end. You will have a piece that not only looks better, but is easier to work with along the way, & will be more durable & last you longer in the grand scheme of things. I’m not an expert by any means but I’ve learned by doing LOTS of research & by just trial & error.
Please don’t hesitate to comment on this post & ask me any questions & I will always answer & try to help the best I can! If you have read this & taken the plunge to do your own project piece, please share in the comments, I’d love to see! You can follow me on Instagram, Facebook & Pinterest for more tips! Don’t forget to Pin this for later!
Shop My Must-Have List:
Until next time Mamas!




Leave a Reply